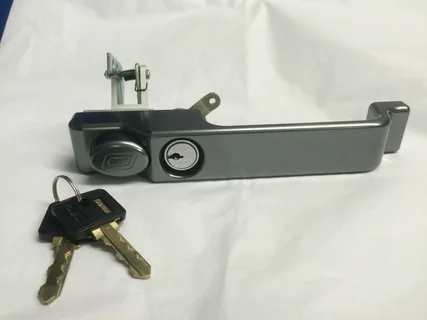
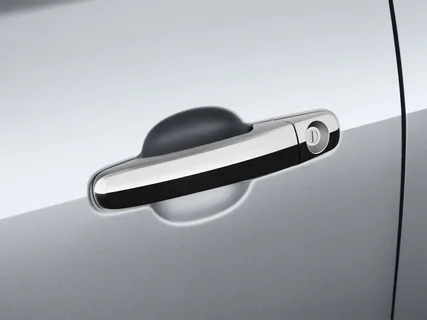
Have you ever struggled to open your car door due to a stubborn or broken handle? If so, you’re not alone. The Exterior Car Door Handle Parts are essential for smooth entry and exit from your vehicle. When they malfunction, it can be frustrating and inconvenient. Fortunately, replacing these components is easier than you might think.
This guide will walk you through the entire process step by step. Whether you’re a seasoned DIYer or new to car repairs, you’ll find helpful tips that make the task manageable. So grab your tools, and let’s start restoring that effortless access to your ride!
Tools And Materials Needed
Before replacing exterior car door handle parts, it’s essential to gather all necessary tools and materials. This will streamline your process and prevent interruptions.
Start with basic hand tools. A flathead screwdriver, Phillips screwdriver, and a set of pliers are crucial for removing screws and clips. These tools will help you access the door panel effortlessly.
Next, consider using a socket wrench set. A ratchet or socket can be handy for loosening bolts that secure the door handle assembly in place. Make sure to have different sizes on hand.
You’ll also want some adhesive or masking tape to label wires as you disconnect them. This step avoids confusion during reassembly and ensures everything returns to where it belongs.
Remember safety gear! Gloves protect your hands from sharp edges, while goggles shield your eyes from debris when working inside the door cavity. Having these essentials ready makes replacing exterior car door handle parts safe and efficient.
Understanding The Components of An Exterior Door Handle
An exterior car door handle consists of multiple components that work together seamlessly. Understanding these parts can simplify the replacement process and ensure you get it right on your first attempt.
The handle is typically made from durable plastic or metal, designed to withstand daily wear and tear. This outer shell provides function and contributes to the vehicle’s aesthetic appeal.
A mechanism connects it to the locking system inside the handle assembly. This includes rods or cables that link the handle to the latch and lock mechanisms, enabling smooth operation when opening and closing doors.
Additionally, springs are often involved in this setup. They provide tension, making it easier for users to pull or push the handle without excessive force.
Many handles come equipped with decorative covers or bezels, which enhance their appearance while hiding unsightly screws and connections beneath them. Knowing each part’s role significantly helps streamline your repair experience as you replace your exterior car door handle parts efficiently.
 Safety Precautions Before Starting the Replacement
Before replacing exterior car door handle parts, it’s essential to prioritize safety. Start by ensuring you have a clear workspace. A clutter-free area allows for better focus and reduces the risk of accidents.
Wearing gloves is crucial during this process. Gloves protect your hands from sharp edges and any debris that might be present inside the door panel. They also offer grip when handling small screws or components.
Safety glasses are another important consideration. Tiny pieces can sometimes fly off unexpectedly when removing old parts or using tools. Protecting your eyes is an easy way to prevent potential injury while working on your vehicle.
If you’re working on electronic door handles or locks, make sure you disconnect the battery. This step helps avoid electrical shocks or short circuits as you work on the door’s components.
Keep all tools secured and organized throughout your project. Losing a tool in tight spaces can lead to frustrating delays and additional risks when searching for it later. Being prepared significantly enhances both safety and efficiency during this repair task.
Removing The Exterior Car Door Handle Parts for Access
You first need to remove the Exterior Car Door Handle Parts to replace. This step is crucial for gaining access to the internal components. Start by gathering the necessary tools, including a screwdriver and a trim removal tool.
Begin by locating any screws that secure the door panel in place. These are often found near the armrest or along the edges of the panel. Remove them carefully, placing them somewhere safe so they don’t get lost during your project.
Next, use a trim removal tool to gently pry away any clips holding the door panel against the frame. Be cautious here; applying too much force can break these plastic clips, leading to additional repairs later on.
Once you’ve detached all screws and clips, carefully lift or pull off the door panel from its base. It might require some wiggling if it’s stuck due to weather stripping or other factors.
As you remove the door panel completely, look for electrical connections to windows or locks. If wires are attached, unplug them before setting the panel aside safely—it’s time to dive deeper into replacing those exterior car door handle parts!
Detaching The Old Door Handle And Associated Parts
Once you remove your door panel, it’s time to focus on detaching the old door handle and its associated parts. Start by locating the screws or clips that secure the handle in place. Depending on your vehicle model, these can be hidden under plastic covers or at various points around the handle.
Using a screwdriver or socket wrench, carefully unscrew these fasteners. Keep them with other small hardware so you don’t misplace anything during reassembly. If there are any retaining clips, gently pry them off with a flathead screwdriver, taking care not to damage surrounding components.
Next, look for any electrical connectors linked to power locks or mirrors. Disconnect these carefully to avoid damaging their wires or terminals. Sometimes, these connectors may be secured with tabs that need pressing before being pulled apart.
Once everything is disconnected, gently remove the old door handle from its housing. Dirt accumulation over time might cause resistance; applying some lubricant can help ease this process without forcing it.
With the old parts now detached, inspect them closely for wear and tear and any signs of rust that could indicate further issues.
Installing The New Door Handle Parts
Once the new exterior car door handle parts are ready, it’s time to install them. Start by aligning the new handle with the mounting holes in your car’s door frame. Ensure that it sits flush against the surface for a proper fit.
Next, take any screws or clips that came with your replacement parts and insert them into their respective locations. Tighten everything securely but avoid overtightening, which can strip threads or break components.
If your new handle includes a latch mechanism, connect it carefully according to the manufacturer’s instructions. Before proceeding, make sure all moving parts operate smoothly.
After attaching all necessary components, check again for alignment issues. Sometimes, even slight misalignments can lead to functionality problems later on.
Give everything one final inspection before reassembling anything else on the door panel. This step helps ensure that you haven’t overlooked any details during installation. Taking these precautions now will save time and effort when testing your newly installed door handle.
Reassembling The Door Panel
With the new exterior car door handle parts in place, it’s time to reassemble the door panel. This step can feel rewarding as you see your hard work coming together. Start by aligning the door panel with the vehicle’s frame. Make sure all clips and fasteners are positioned correctly.
Carefully press down on the edges of the panel until you hear a satisfying click, indicating that it’s secured in place. Don’t rush this process; take your time to ensure everything fits snugly without forcing any components.
Next, locate the screws or bolts you removed earlier. These will typically go around the perimeter of the door panel. Use a screwdriver or wrench to tighten them securely, but avoid overtightening, which could damage plastic components.
Once all screws are back in their places, reattach any accessories like window switches and speaker covers if applicable. Ensure each piece snaps into position firmly for good measure.
Double-check that everything is aligned properly before testing your newly installed handle. A well-assembled door panel ensures functionality and maintains your vehicle’s aesthetic appeal.
Testing The Functionality of The New Handle
After installing the new door handle, it’s time to test its functionality. This step is crucial to ensure everything is working smoothly. Begin by gently pulling on the handle from outside the vehicle.
Next, check how easily it opens the door. A properly installed exterior car door handle should respond immediately without resistance or odd noises. There may be an alignment issue if you hear anything unusual or feel a stiff movement.
Now, take a moment to verify that the locking and unlocking mechanisms are functioning correctly. Use your key fob or manual lock to see if everything works seamlessly with your new handle.
Remember to test from inside the vehicle as well! Ensure that passengers can open the door effortlessly when needed. Safety is paramount; every aspect should function flawlessly for peace of mind during travels.
If all functions perform as expected, congratulations! You’ve successfully replaced your exterior car door handle parts and restored full usability to your vehicle’s doors. Enjoy that satisfying feeling of accomplishment after tackling this DIY project yourself.
Conclusion
Replacing exterior car door handle parts can seem daunting at first. However, it becomes a manageable task with the right tools and a little patience. You also gain the satisfaction of repairing your vehicle yourself.
Understanding each step in the process is crucial for success. From removing the door panel to installing new parts, attention to detail matters. Skipping steps can lead to complications down the road.
Testing functionality before reassembling ensures everything operates smoothly. A properly functioning door handle improves convenience and safety when entering or exiting your vehicle.
Remember that routine maintenance on other components may also be necessary. This keeps your car in top shape and prolongs its lifespan.
Taking control of repairs empowers car owners. It’s an opportunity to learn more about how your vehicle works while saving money on labour costs at auto repair shops. Embrace this DIY spirit; you’ll find it rewarding!
FAQs
What tools do I need to replace exterior car door handle parts?
You typically require basic hand tools such as screwdrivers, a socket set, and pliers. You might also need specialized trim removal tools depending on your vehicle model.
How long does it take to replace an exterior car door handle?
The time required varies based on your skill level and specific vehicle design. If you follow a guide closely, you can expect to spend about 1-2 hours.
Can I replace the door handle without removing the entire door panel?
Yes, in most cases. However, access points depend on your car’s make and model. Always consult your owner’s manual or service guide for specifics related to your vehicle.
| Other Good Articles to Read |
| Cme Blog Spot |
| Garcias Blogs |
| Yyc Blogs |
| Guiade Blogs |
| Blogs-Hunt |
| Impact-Blog |
| Smarty Blogs |
| Ed Blog |
| Mo Blogs |
| Blogs Em |
| Blog St |
| Related Business Listings |
| Contact Directory |
| Local Business Profiles |


